Online laser cutting guide & FAQ
Preparing your graphics
In order to use this service correctly you need to consider the following advice to prepare your design for use with our platform.
The only file type our online platform currently accepts are .SVG files (Scalable Vector Graphics). When saving a file to .SVG format, the styling options must be set to Presentation Attributes.

.SVG files can be created with graphic illustration software such as Inkscape (available for free), CorelDraw, Adobe Illustrator or AutoCAD.
For cutting we use 2 colours of outline (red & blue) at a hairline thickness. Any part of your design you want cutting out simply make it into a red or blue hairline
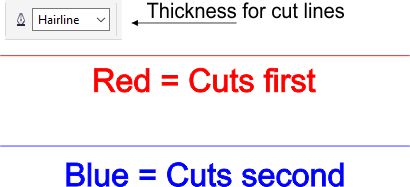
We usually use the outline colour RED (Hex: #FF0000) to set the areas we want to cut out first. We do this to improve the accuracy of the cut.
Using the outline colour BLUE (Hex: #0000FF) you can define the edge of the design and insure it is cut out last. This is ideal for the very outline of your project as it means all the middle bits will be cut out first.
This feature is only available if you select an engraving + cutting material
We use BLACK (Hex: #000000) outlines and fill settings to set parts of graphics that we want to engrave.
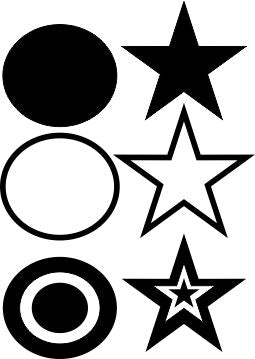
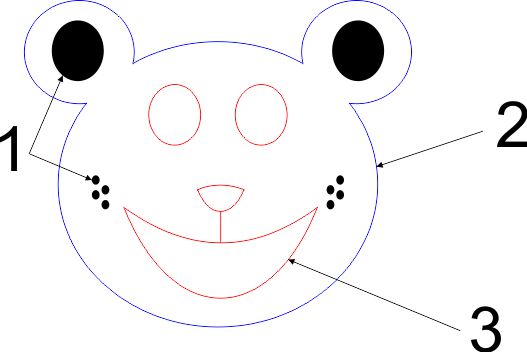

1). These parts will be engraved into the material leaving indentations
2). The outline will determine the shape of the entire object
3). The eyes, nose and mouth will be cut out first, this insures that inside details cut in the correct location
Using the platform
Now you have a graphic ready for laser cutting/engraving you are ready to take it into our platform.
Select the material type you wish to use. You can browse all the materials we have to offer by catagory or select custom material to send us your own material sheets.

After selecting your category you can browse the products and make a selection

From the product page simply click "CUSTOMIZE IT" to open up the platform with your selected material

A). Cutting method A is perfect if the letters are the design you require cutting out. Making sure that all the holes inside the letter are red outlines so they cut out in the correct position. This can be done by breaking the letters into individual shapes and setting the outline colour.
B). Cutting method B is ideal for laser cut stencil making, it simply requires you to eliminate all holes from letters. This can be achieved by using a stencil font or by manually altering the text graphics so there are no holes.
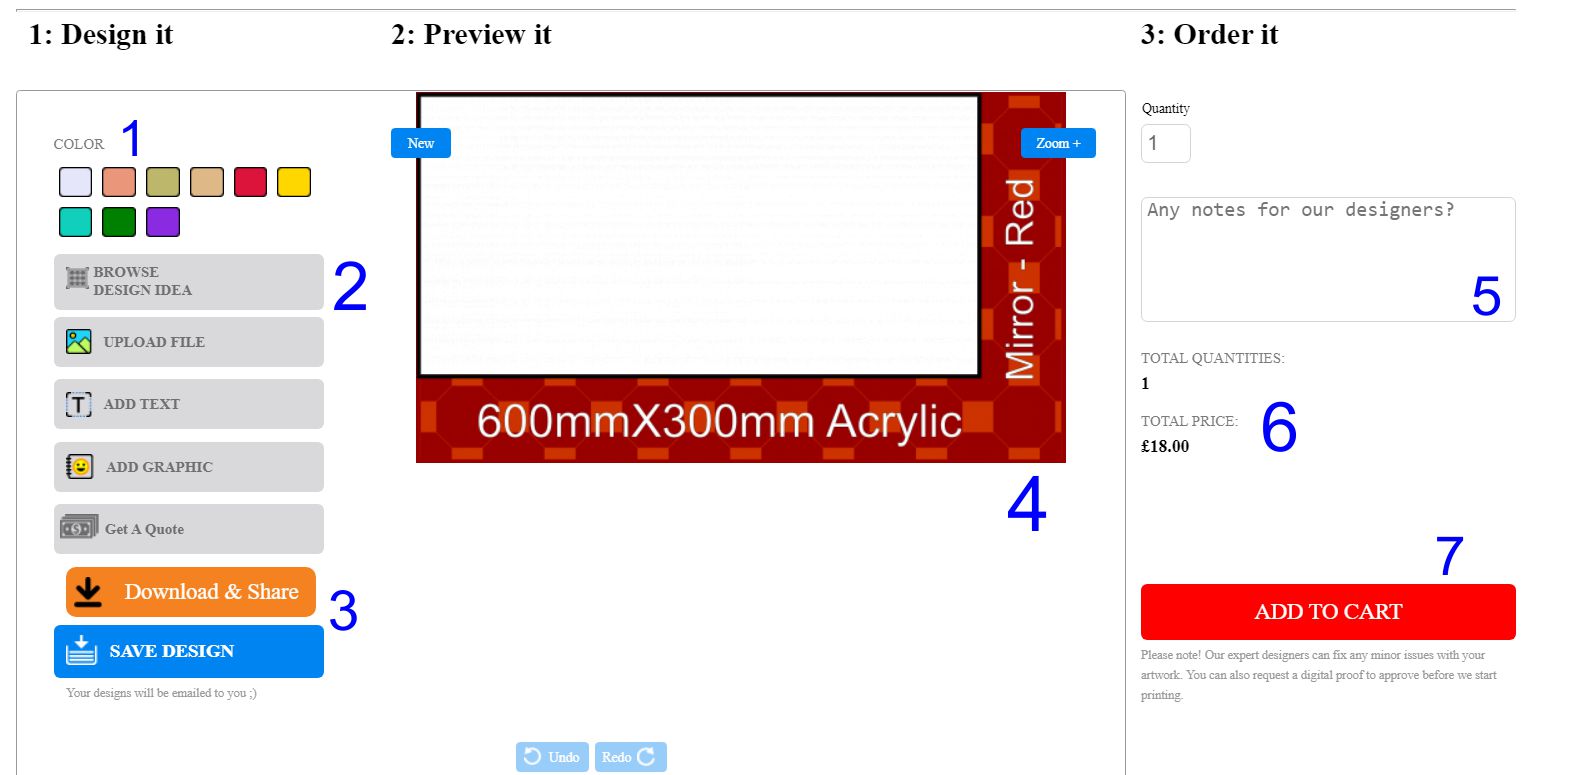
1: Product Colour). This option lets you choose the colour of your selected material. The available colours vary from material to material and some have an extra charge included to reflect the price of the material.
2: Toolbar). From here you can upload your own graphics, add text or load in one of our templates
3: Download, share and save). These buttons let you download print proofs, share your idea on social media and save your current progress on the platform via email.
4: Work area and information bar). This is your active print area and some information about the material you are working on, the colour and maximum sheet size.
5: Quantity & notes for designers). Quantity allows you to order multiple sheets of the same design. By leaving a note to our designer, you can let us know if you have any special requirements such as wanting to use more than two colours of outline so you can set one colour to laser etch or giving us specific measurements for your design.
6: Total Price). This displays the calculated price of your design (per square inch) and the material cost.
7: Add to cart). This will let you purchase your custom design when you are ready. You can continue shopping or view your basket.
Some of our products are available in multiple colours. You can toggle the colours via the "Color" bar at any point while using the platform. The information bar in the work area will change to reflect your selection. You can mouse over a selection see the name of a colour before you select it.
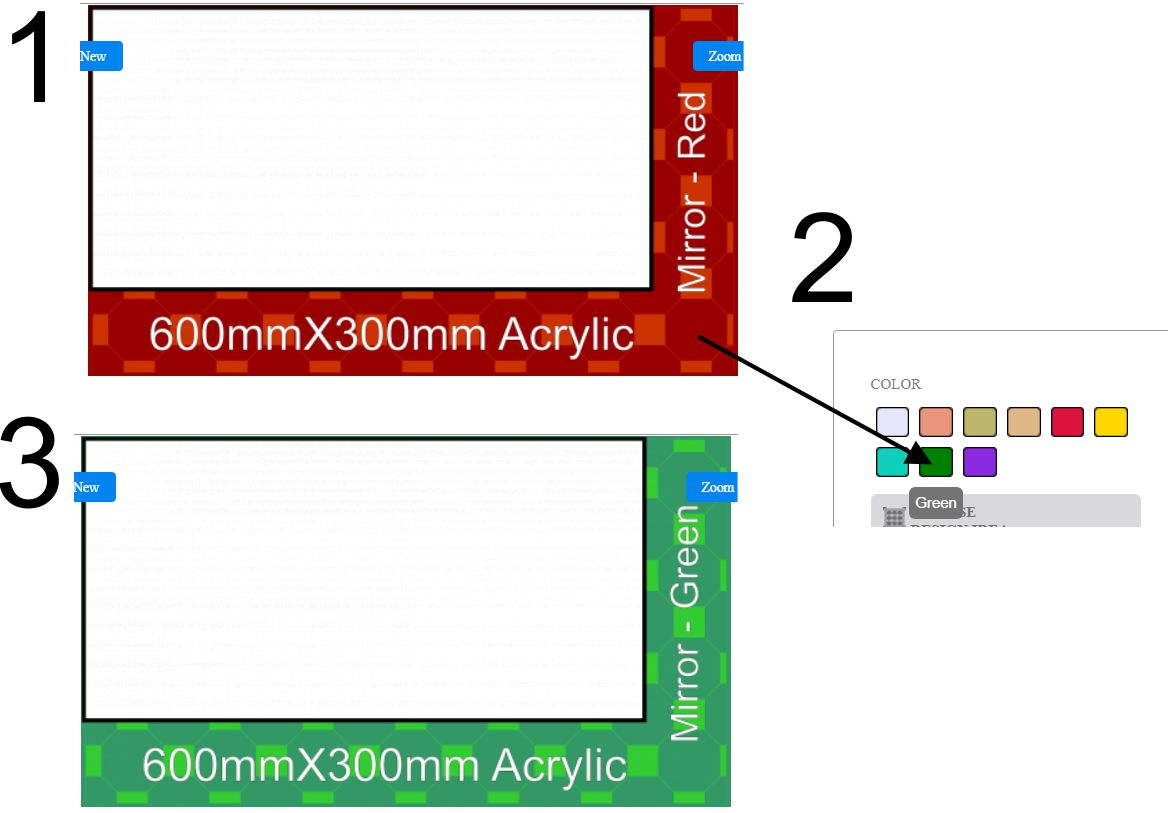
Some colours may also carry an extra charge so please be aware when selecting a colour. Colour names and info bar colours are only a rough approximation and don't necessarily reflect the final colour or finish.
The main feature of our laser cutting service is the option to upload your own graphics to the workspace. This can be done by selecting the upload file button in the toolbar.

For here you can upload your design by clicking on browse and uploading it from your own device.
While it does say we accept different file formats the only format that will work correctly with this service is .SVG
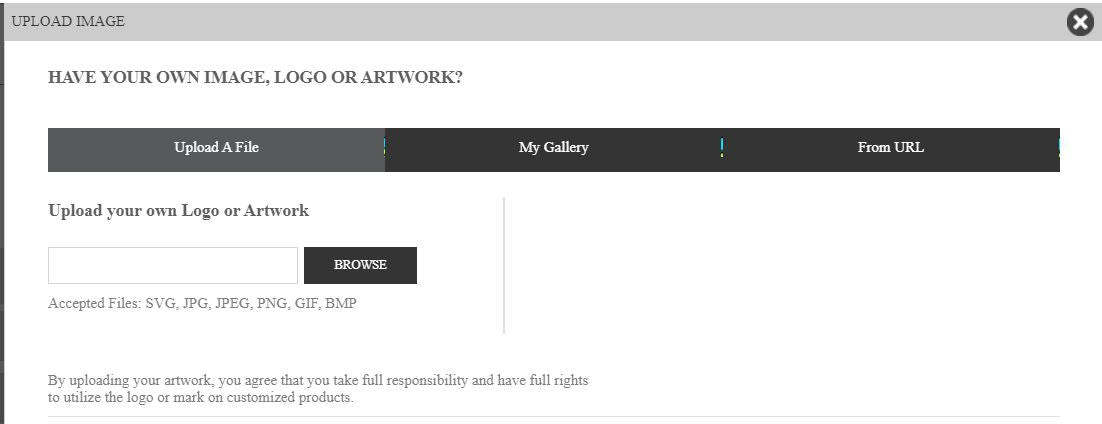
Once you have uploaded a file it should look a little something like this:
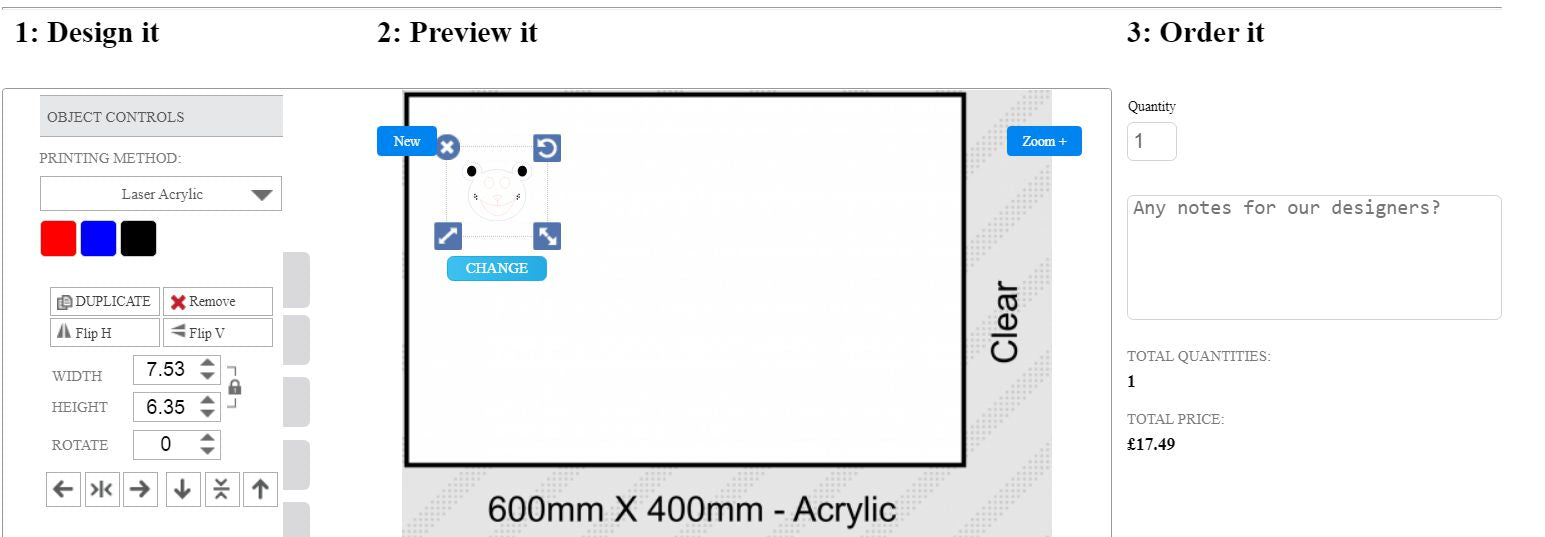
From here you can resize your image by either dragging the arrows around your uploaded image or by typing the numbers in manually over in the side bar. The design platform works off of centimetres (cm).
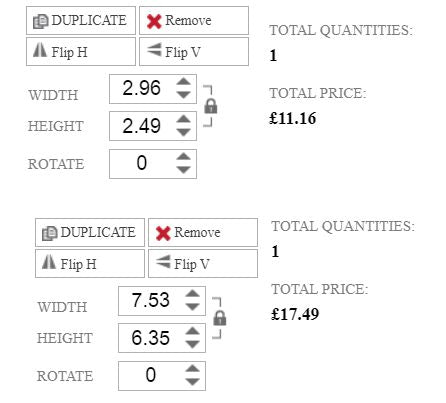
Resizing your image will alter the price accordingly.
If you are still unsure or want to ask a question about your design, you can click "Get a quote" and fill out the form, leaving us a message in the notes section and we will do our best to help you. This way you can send us your design for review before purchase.

Once you are happy with your design you simply add it to your cart.
Tips & Advice
Some projects may require text to be laser cut rather than engraved and this can present a few issues with bits dropping out. We have prepared a little guide to help you achieve a couple of different effects.
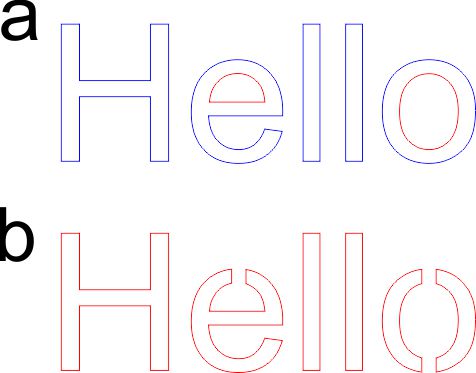
A). Cutting method A is perfect if the letters are the design you require cutting out. Making sure that all the holes inside the letter are red outlines so they cut out in the correct position. This can be done by breaking the letters into individual shapes and setting the outline colour.
B). Cutting method B is ideal for laser cut stencil making, it simply requires you to eliminate all holes from letters. This can be achieved by using a stencil font or by manually altering the text graphics so there are no holes.
We are able to cut using more than the standard 2 colours of outline but if you require this you must define it in your design and leave a note with our designers on purchase or by reaching out to us via email at zak@makelasergifts.com
FAQ
Unfortunately we are unable to cut through metal with our laser cutting machine, we are however able to engrave on anodised metals and metals with a non metallic coating.
Our laser cutter has a bed size of 740mm x 420mm
We are able to etch outlines so they do not cut all the way through. In order to do this you must tell us what colour of outline you wish etching rather than cutting in the "leave a note for designer" box on the design platform. This is charged at the same rate of cutting.
The acrylics we offer are just a fraction of the colours and styles available, we have simply cherry picked some of the more common colours. You can use the custom material option for plastic if you wish to use your own colour of acrylic.
At this moment in time the online laser cutting platform is only set up towards wood and acrylic as these are the two most commonly laser cut materials, however we are able to cut and engrave a much wider array of materials.
| MATERIAL | CUT | ENGRAVE |
|---|---|---|
| Paper | Yes | Yes |
| Card | Yes | Yes |
| Mountboard | Yes | Yes |
| Felt | Yes | Yes |
| Fleece | Yes | Yes |
| Leather | Yes | Yes |
| Cork | Yes | Yes |
| Slate | No | Yes |
| Granite | No | Yes |
| Glass | No | Yes |
| Ceramic | No | Yes |
| Anodised Aluminium | No | Yes (coating only) |
| Enamel/Powder coated metals | No | Yes (coating only) |
If you wish to work with any of these materials please get in touch via email zak@makelasergifts.com or check out our selection of laser engraved gifts as we may already provide a means to make what you are looking for.
If a material option proves to be in high demand we may add it to the current selection of materials for our online cutting service.